More and more fabricators are taking before and after photos of their jobs. There are many reasons for this, but the reason we hear most often is to reduce the risk of a homeowner making a claim for something that happened before or after installation.
You can upload photos directly from quotes or jobs, and you can do this from the field with your cellphone or internet-connected tablet. When you do this, each photo is uploaded independently and shows up as a separate file at the bottom of the quote or job.
Some people prefer to have just one file for all their before or after photos on a job…for example, instead of having 10 separate before photos, you could have just 1 pdf file with 10 pictures in it. You can do that by using a 3rd party app. I’m going to show how to do that with an app called Scanner Pro on an iPhone, but there are similar apps on Android devices (and many other options for the iPhone as well). This is just one way to do it.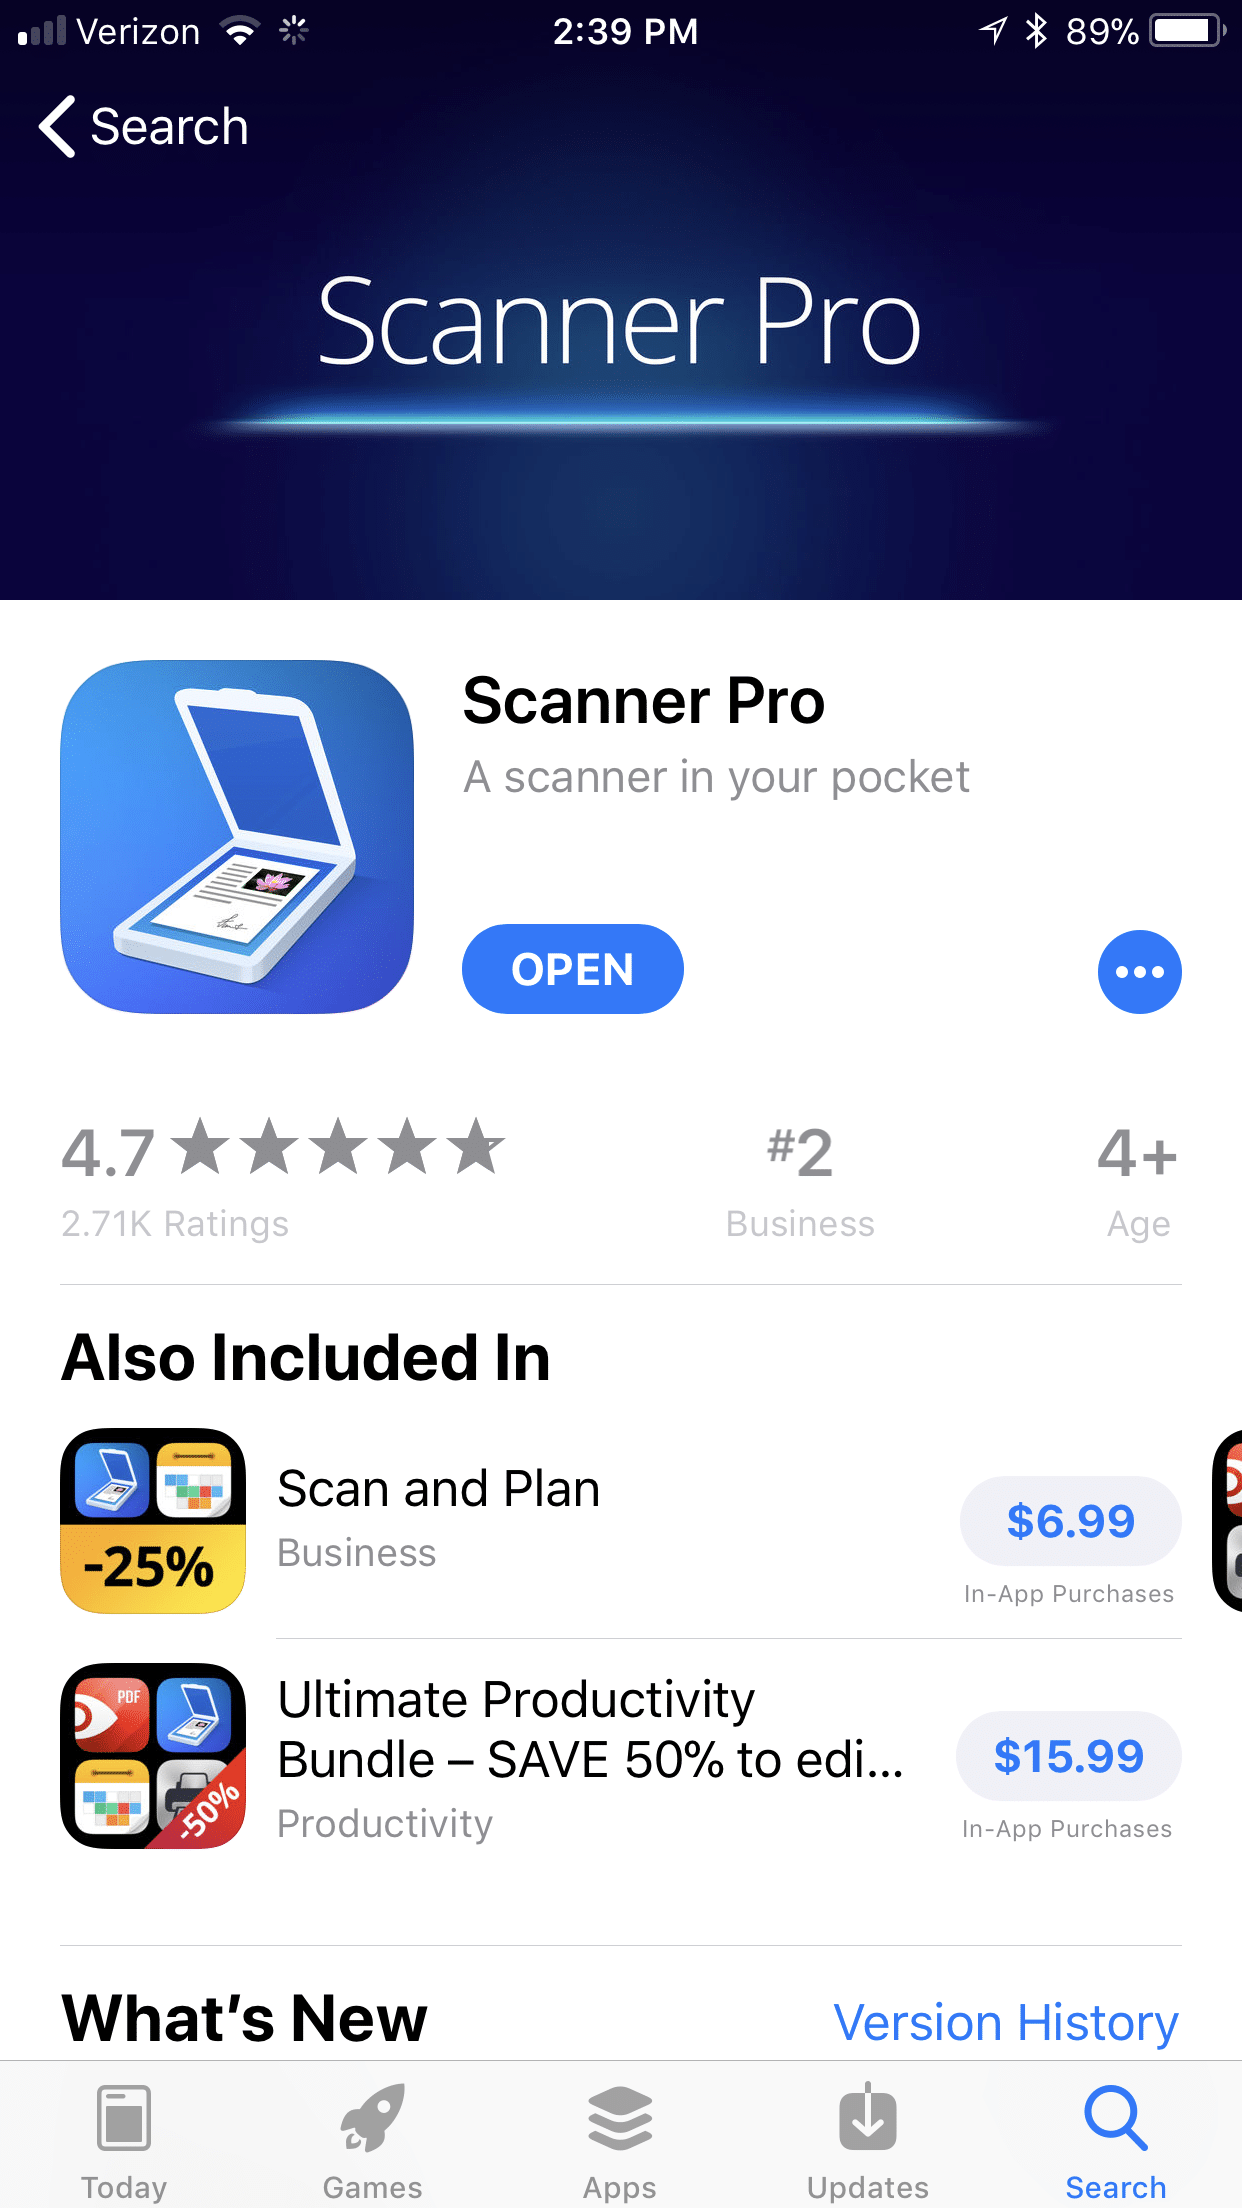
Installing a 3rd-party pdf app on your phone is appropriate for technical users – it’s not appropriate for everybody. If you’d rather not think about it, then call Job Well Done. They’ve done the work to make things like this super easy for Moraware users.
That said, if you want to give it a try, here’s how to use Scanner Pro to upload several pictures at once.
First, go to the App Store and install the app.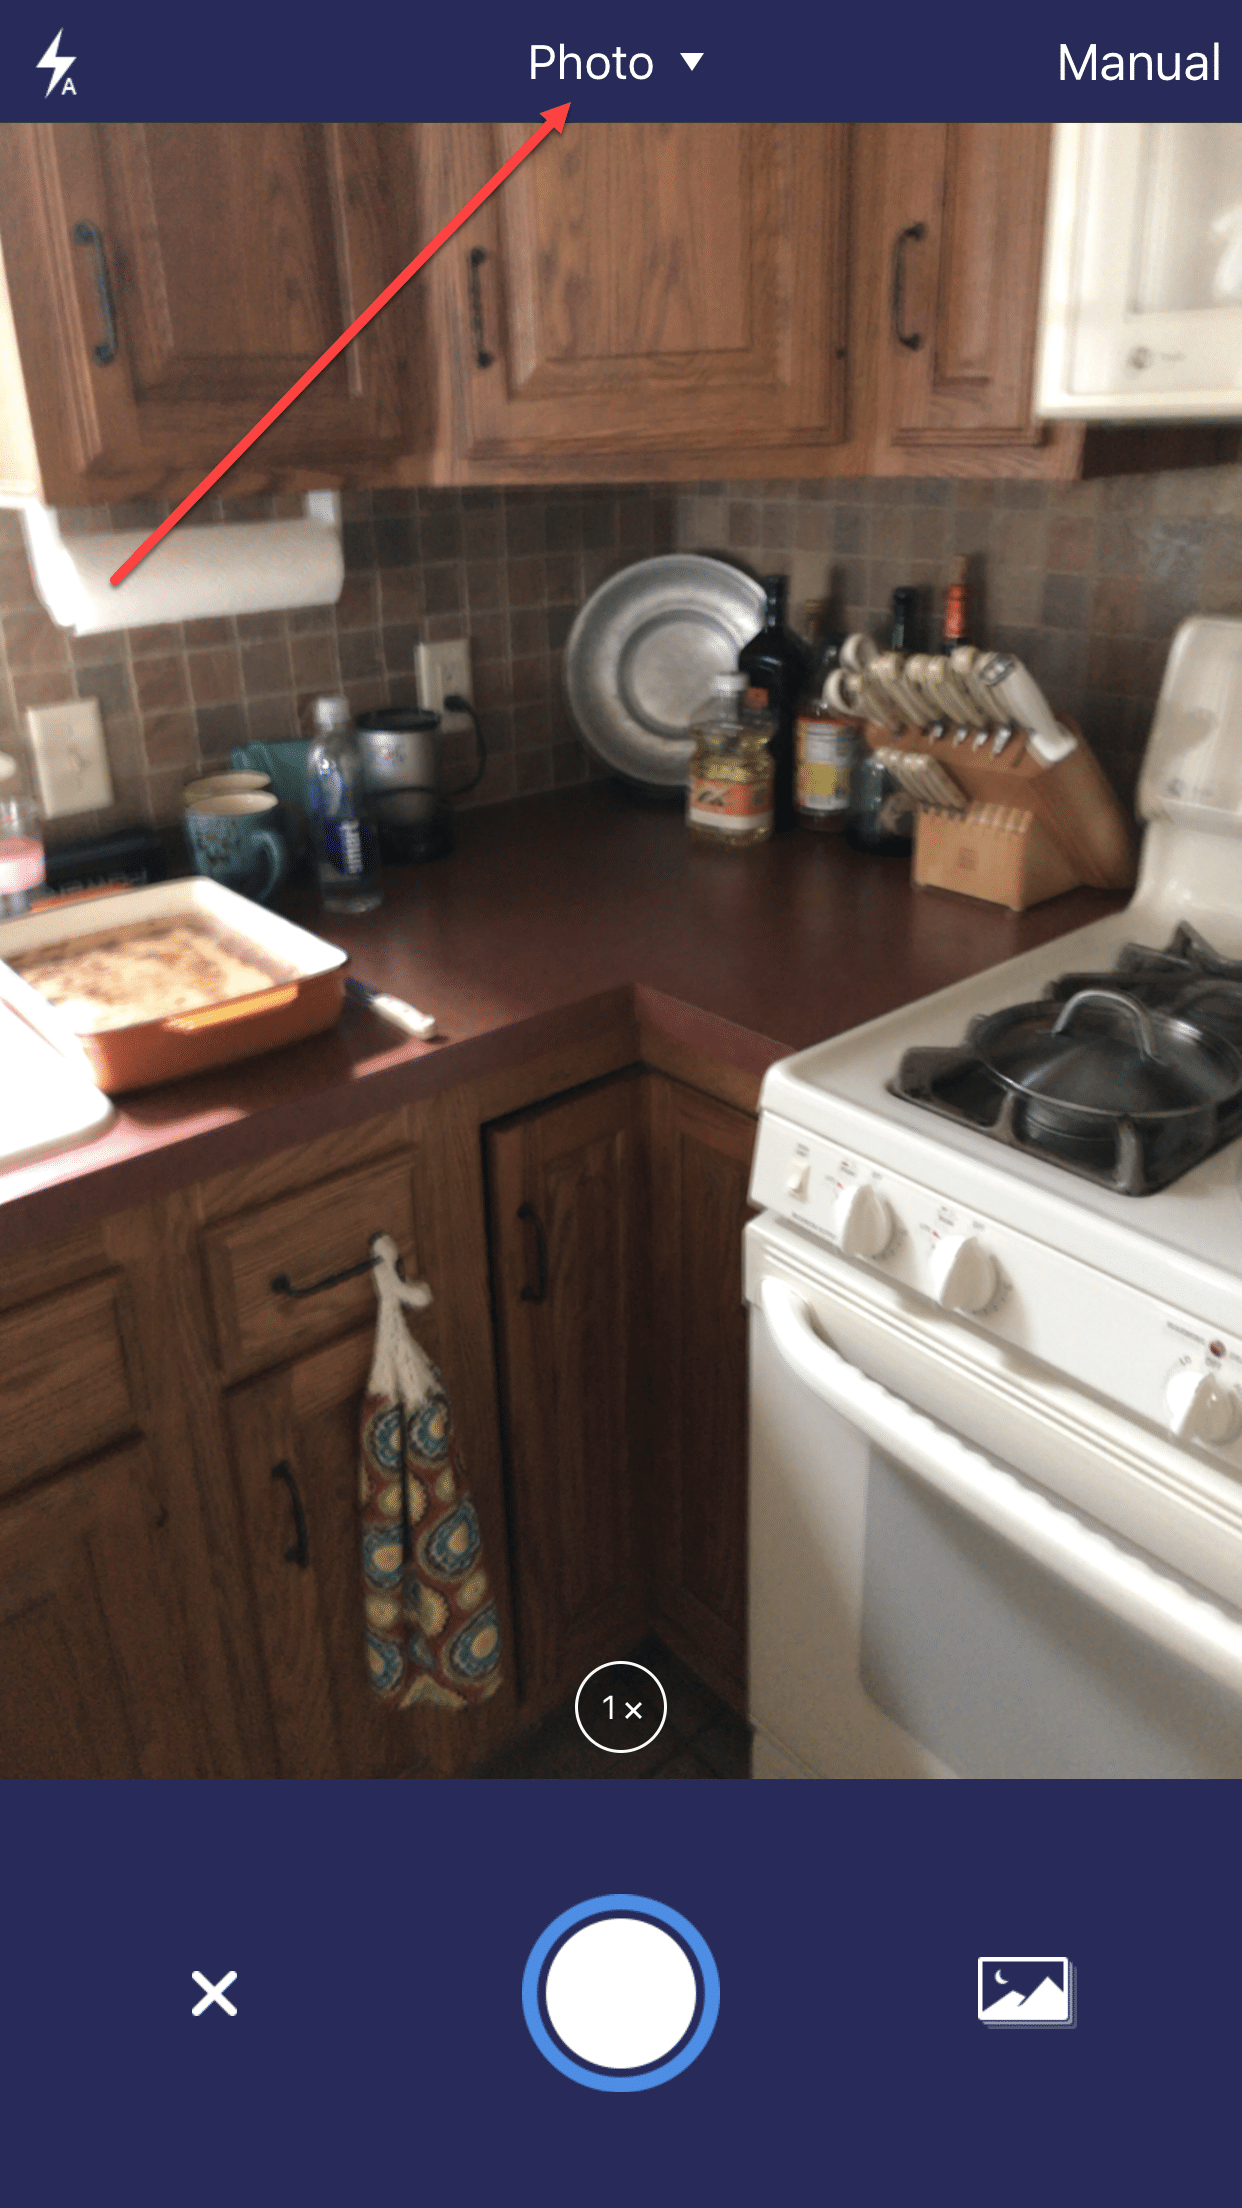
Next, open the app and click the big plus sign to start a scan.
Set the type to Color Photo.
Now just use the app as your camera and take a handful of pictures. Ten pictures is probably the most you’d want to put in one file – much more than that, and you’ll have a hard time uploading it. You’ll have to experiment to find the right number and naming for your situation.
After you take a picture, you have to “save selection” … If the selection looks skewed, then click Select All first.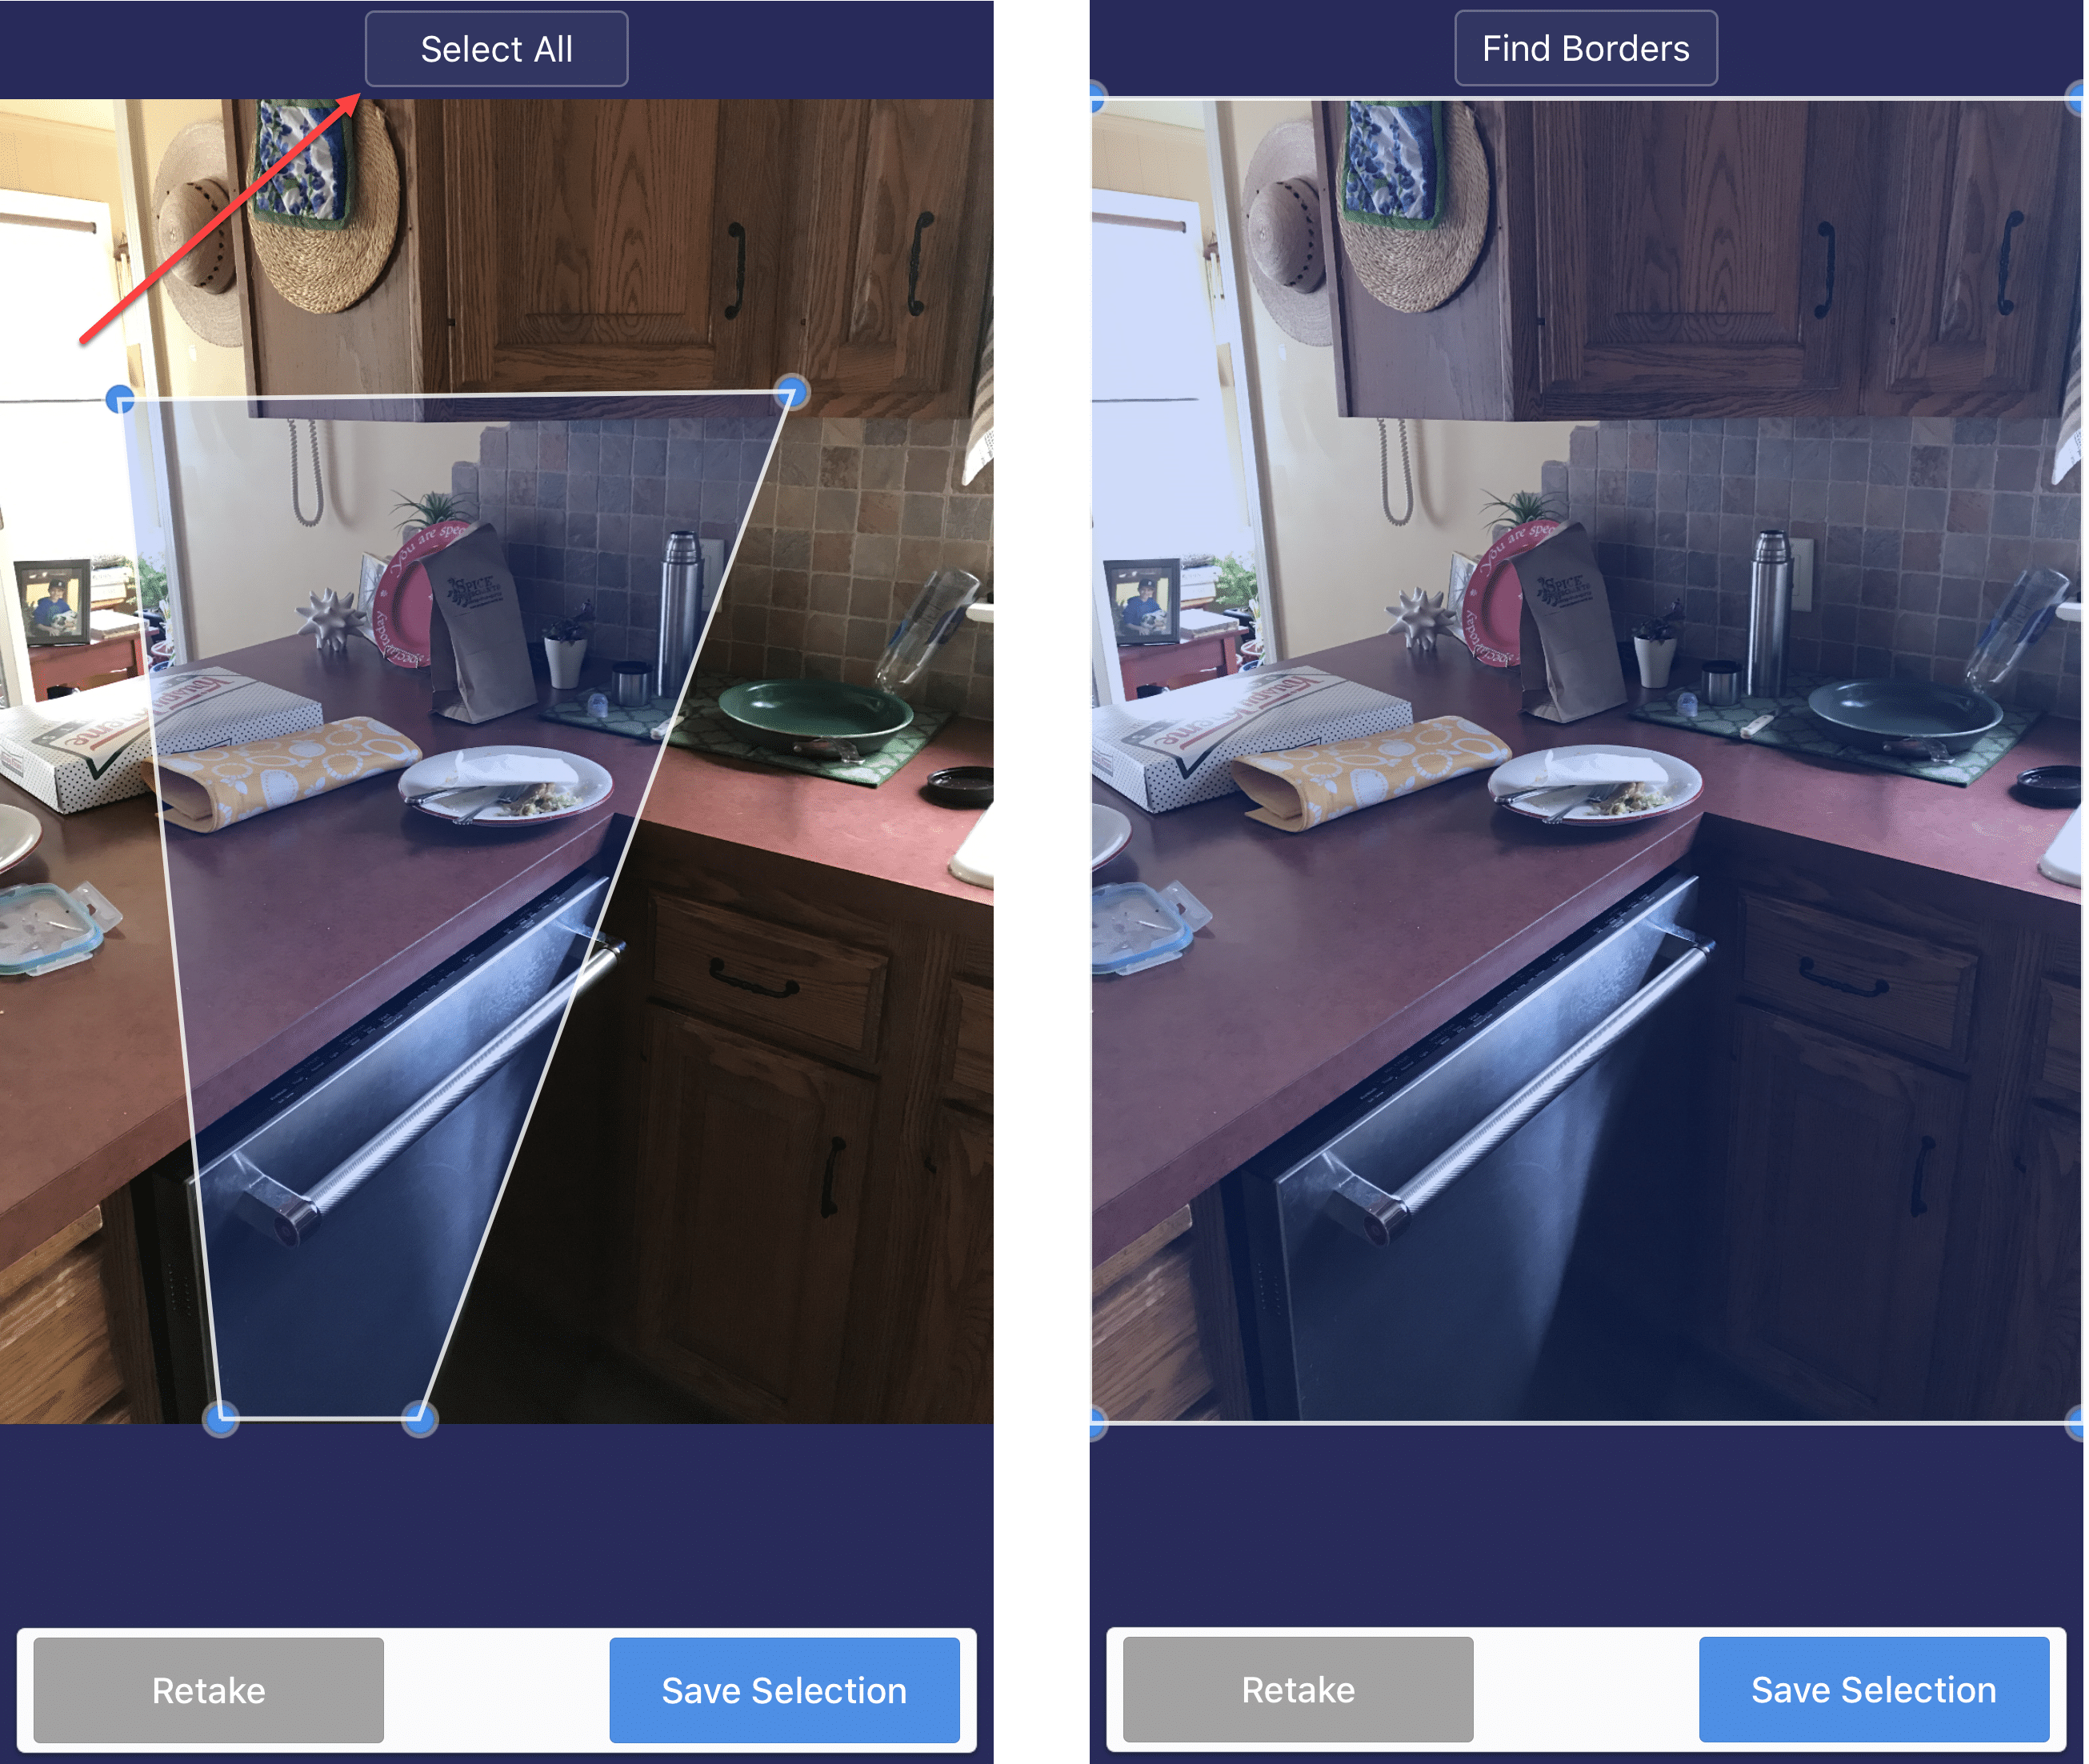
When you’re done taking pictures, click the little X on the bottom left to close the camera, then click the Save button.
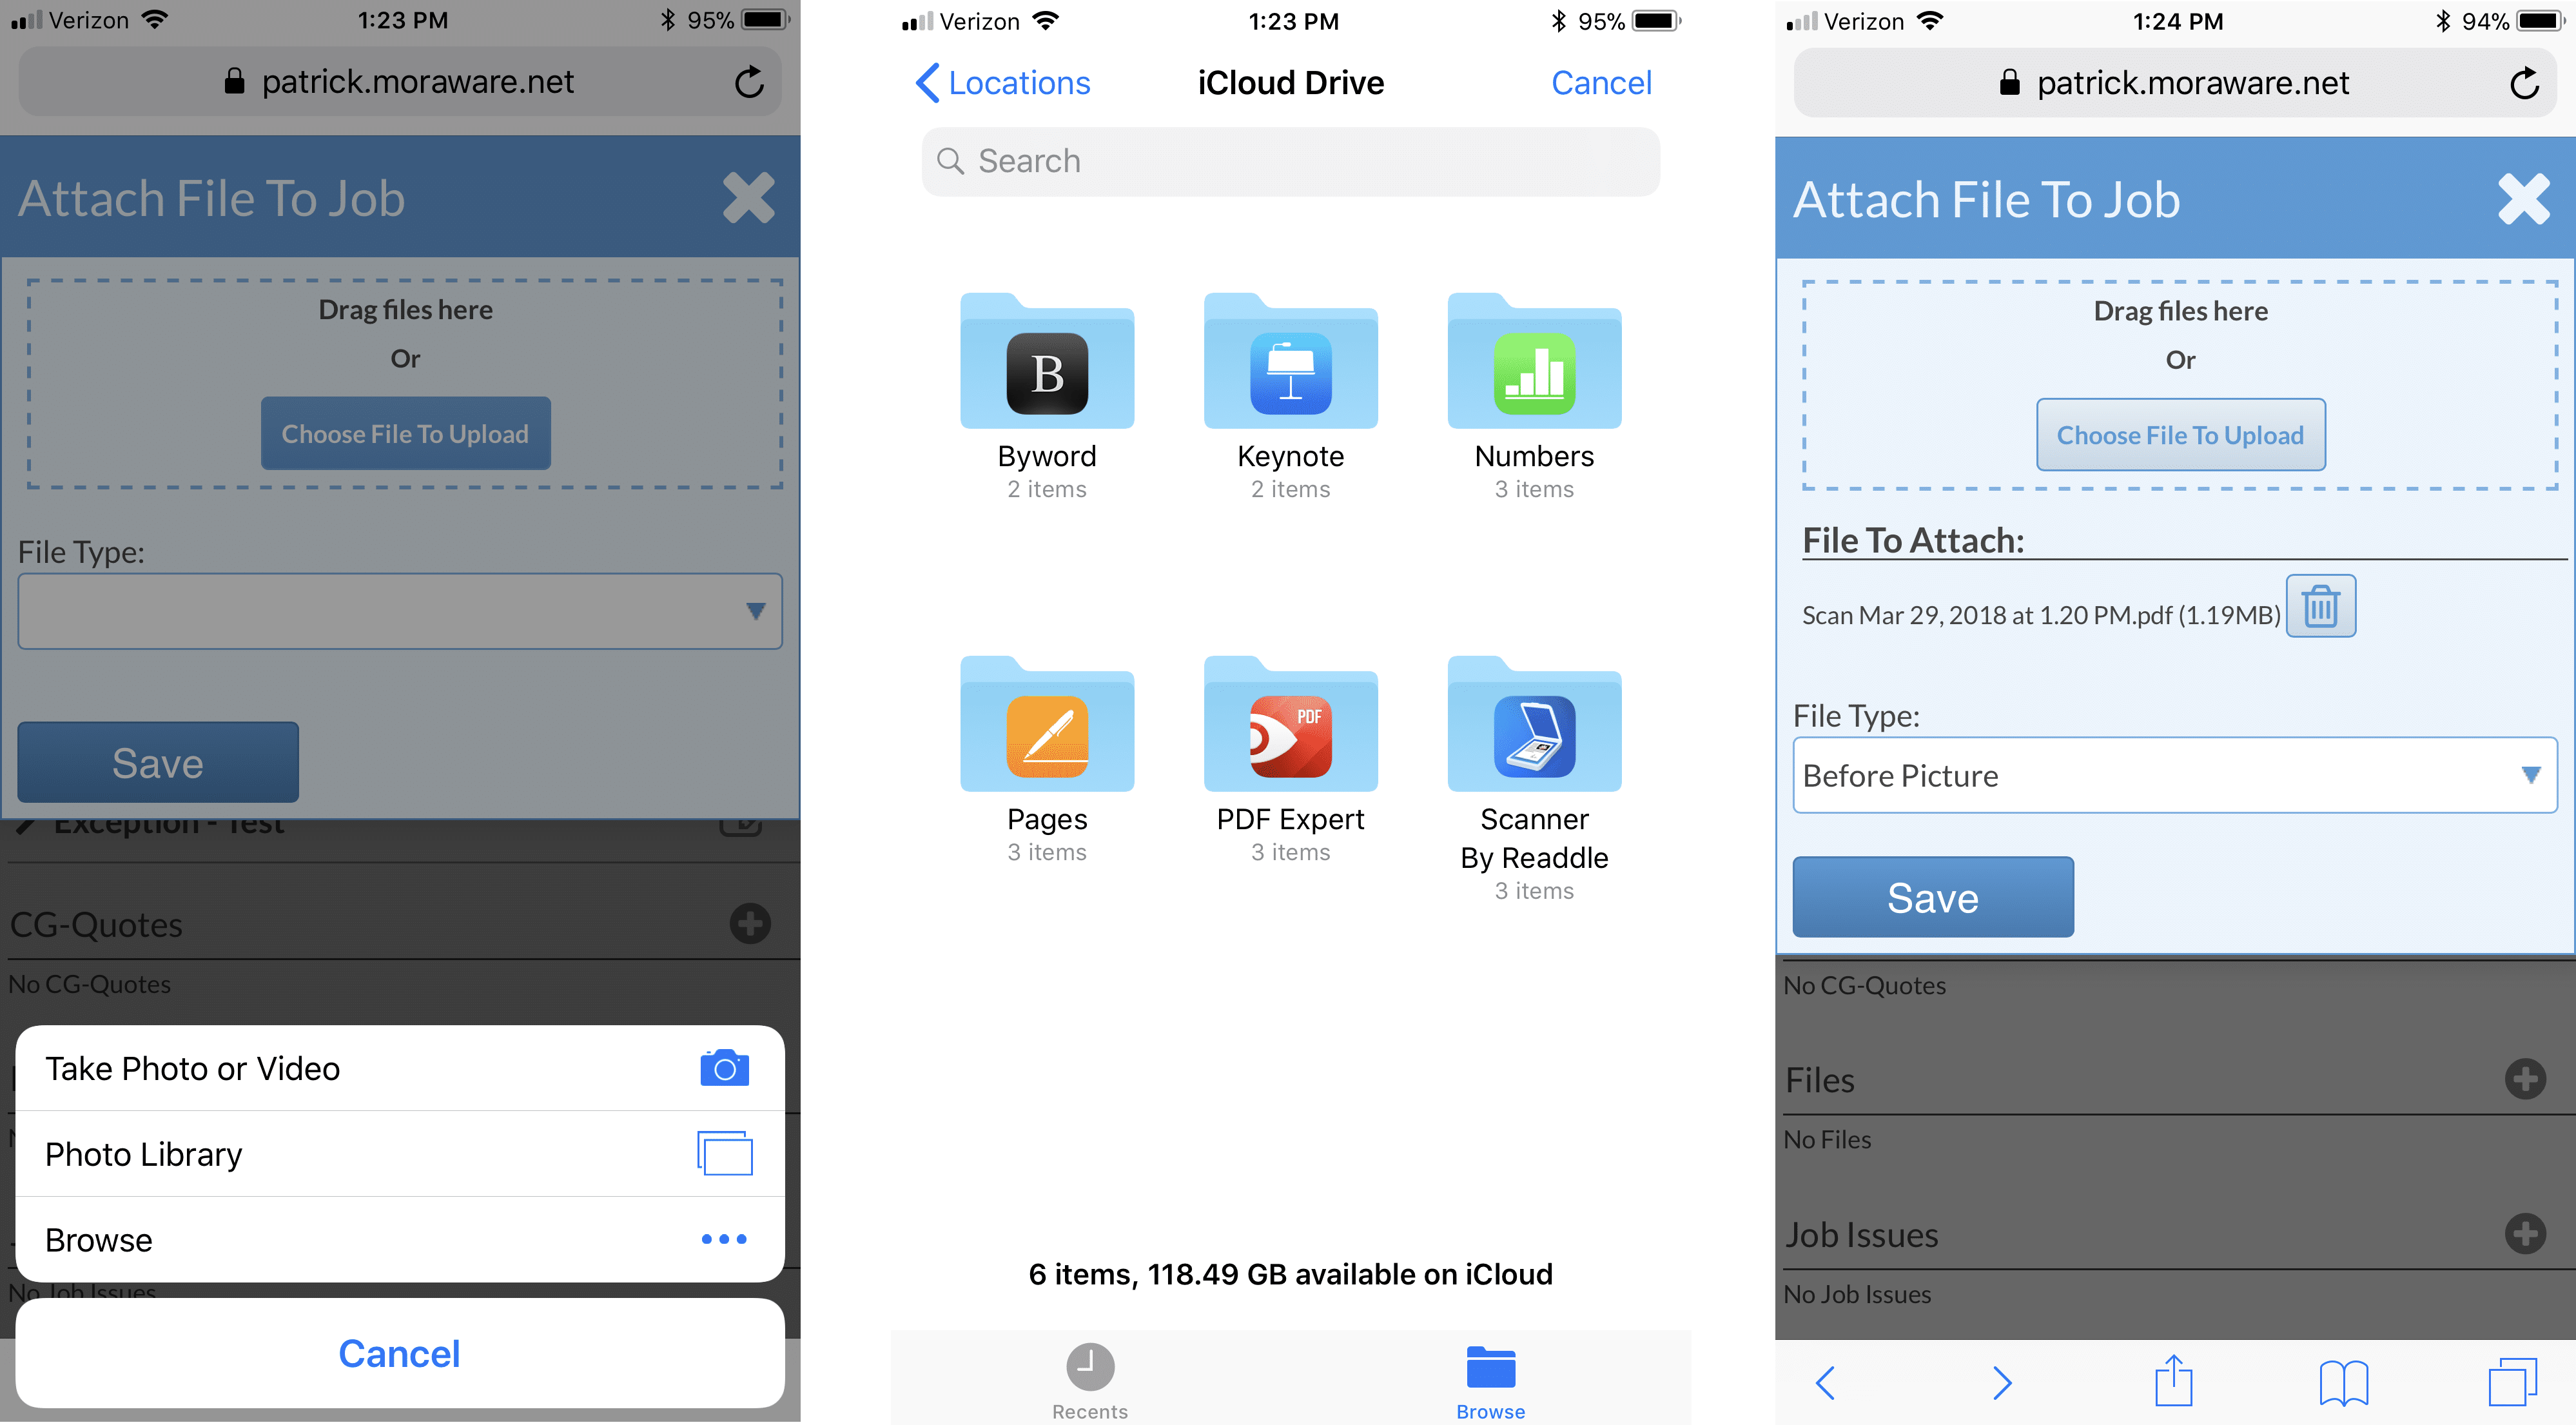
To upload the file to a job, click the plus sign above Files in Systemize or the Attach File button in JobTracker. Choose Browse, open the Scanner folder, and find the file you just created. Then choose the right file attributes and upload. If this sounds intimidating, then it’s probably not for you – but if you like using apps on your phone, give this approach a try!